how to read propane tank expiration date manufacture date lp cylinder

How to tell if your propane tank is expired

This article will help you determine if your propane tank is expired, whether it can be refilled, and what to do when it is expired.
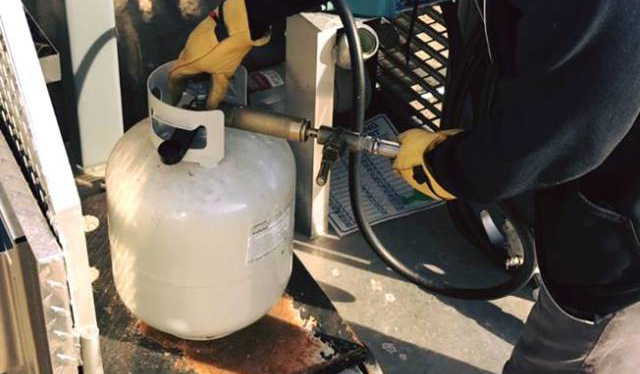
How long are propane tanks good for?

Propane tanks are incredibly resilient, built to safely contain liquid propane gas stored under pressure while also standing up to extreme weather and elements. But even the sturdiest tank has a shelf life, and as such must be periodically reviewed and inspected. A propane tank is good for 12 years from the date of manufacture. A recertified tank is good for 5 years from the date of certification.

How to tell if your propane tank is expired.

The easiest way is to inspect the collar or handle area of your propane tank. This won’t give you a direct answer to the question “when do propane tanks expire?” but it will tell you when the tank was manufactured or last certified. Then you will be able to figure out if it is expired.

How to read the markings on a propane tank.

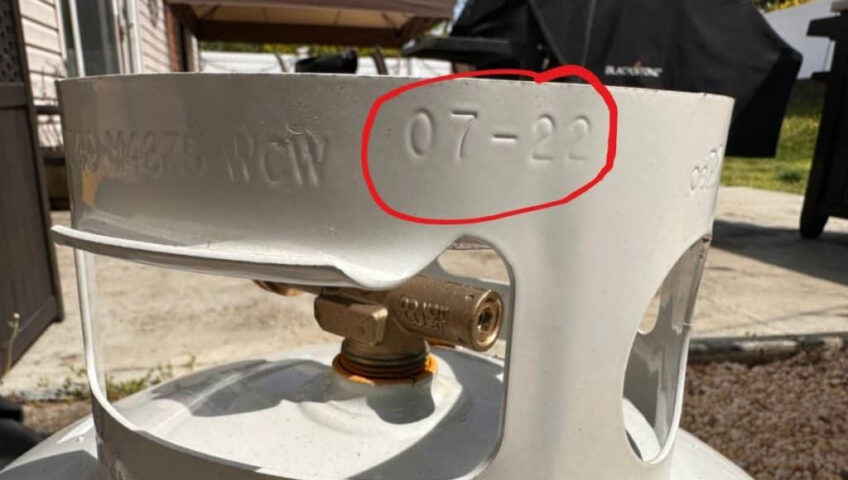
Near the handle, you will find a series of stamped markings. These provide important information about your tank’s origination and capacity rating. A date should appear on the handle, near the valve indicating the manufacture date. It most often reads in a standard Month-Year format. So if your tank was built in June of 2020, it would read “06-20.” Then you add 12 years to that date to see if it is expired or not.

If it is expired, look around the collar some more to see if you see a marking with the same month-year format with an E after it. It would look like this “06-20E” This would indicate that the tank was recertified on this date, meaning it is good for 5 years after this date.
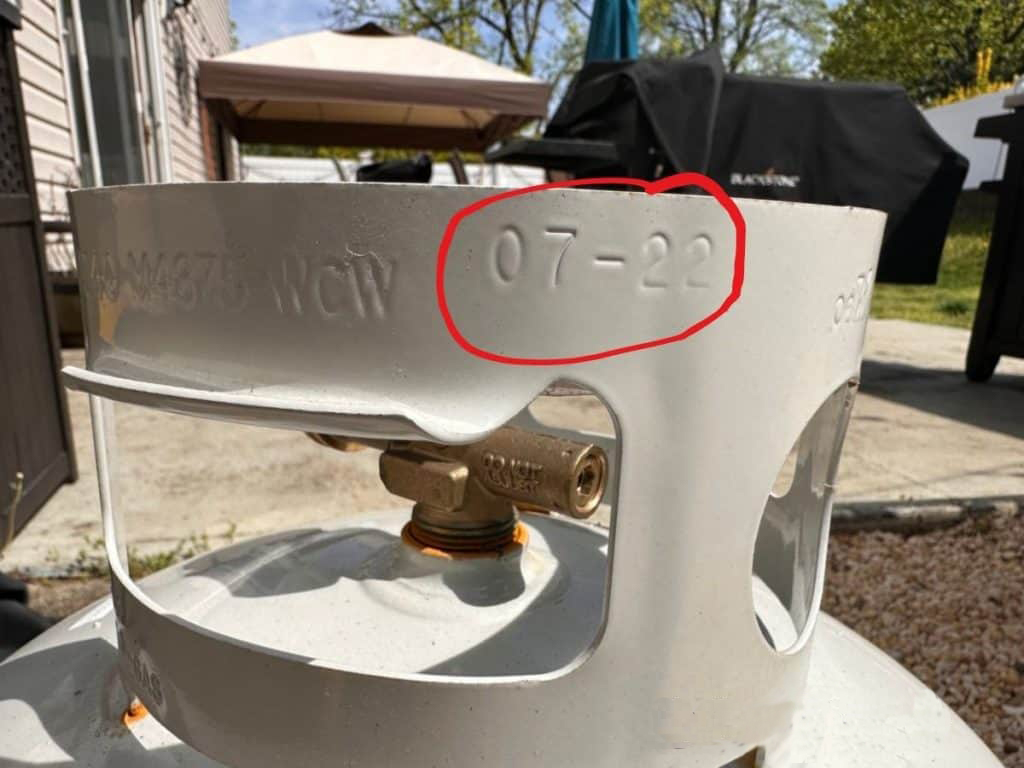
how to read propane tank expiration date manufacture date lp cylinder

Additional Propane Tank Markings.

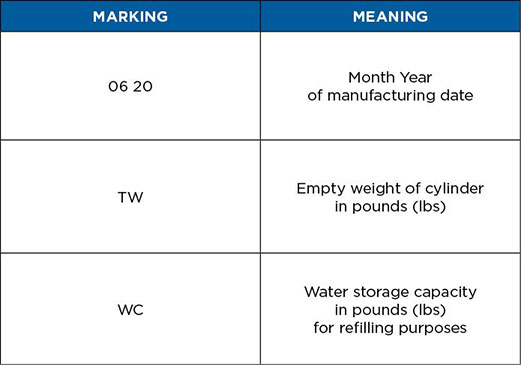
Additional markings indicate the empty weight of the cylinder, listed as “TW.” This is helpful if you want to weigh the tank to gauge how much propane is left available for use. The stamp “WC” indicates the water storage capacity, which helps dealers know the precise amount of propane that can be safely stored inside the tank.

How to know how much gas is in your tank?

The best way to figure out how much gas is in your propane tank is to weigh it. Find the marking on your tank that starts with TW. This will tell you the weight of your tank empty. Then weigh your tank and subtract your empty tank weight by the weight of your tank currently to figure out how many lbs are left in your tank. A typical 20lb propane tank that is used for grilling will weigh 17lbs empty and they hold 20lbs of gas, so a filled grill tank will weigh 37lbs. So if you weigh your tank and it is reading 27lbs, that means there is 10lbs of gas left which is 50%.
 

propane markings how to read propane tank

How to know what size propane tank you have?

If you are trying to figure out how much gas fits in your tank but are not sure what size propane tank you have, find the WC marking on your tank. Then use the chart below to find out how many lbs of gas will fit in your cylinder. This will tell you what size propane tank you have.
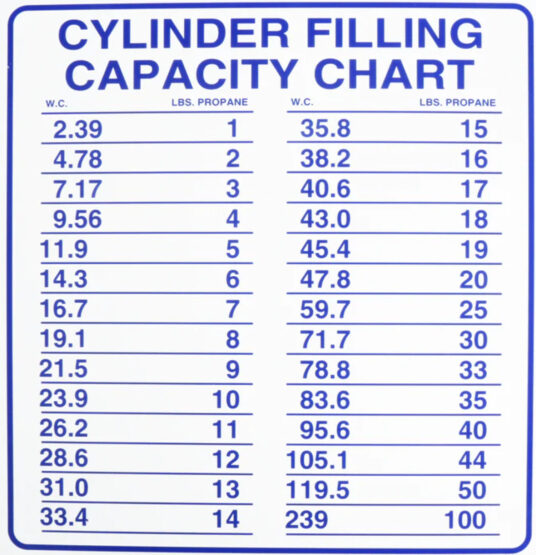
cylinder filling capacity chart for propane tanks

What should you do if your propane tank is expired?

If your propane tank is expired you can go to your local gas station or hardware store to exchange it. They do not care about the expired tank because they send the tanks to get recertified. They will give you a tank that should be good for a few years which you can then refill once you empty it. You can also find a company that recertifies them. Not many places do this but if you find one close to you it may be worth it.

Is it better to exchange propane tanks or get them filled?

We always prefer refilling propane tanks because you will receive more gas when doing this. Your typical 20lb propane cylinder will fit 20lbs of gas in it. When you exchange your tank the tanks are usually prefilled with only 15lbs of gas in them so refilling usually will give you more gas and more bang for your buck!

If you are local to Columbus, Ohio, stop by Specialty Gas House in Clintonville to refill your propane tanks. We have the best pricing on refills and have a rewards program on 20lb grill tanks where your 6th refill will always be FREE! We also fill 5lb, 10lb, 30lb, 33.3lb, 40lb, 100lb, RV and forklift tanks at our facility in shop in Clintonville.

specialty gas house grilling class dish

Specialty Gas House Grilling Class

Grilling Class with The Specialty Gas House Crew

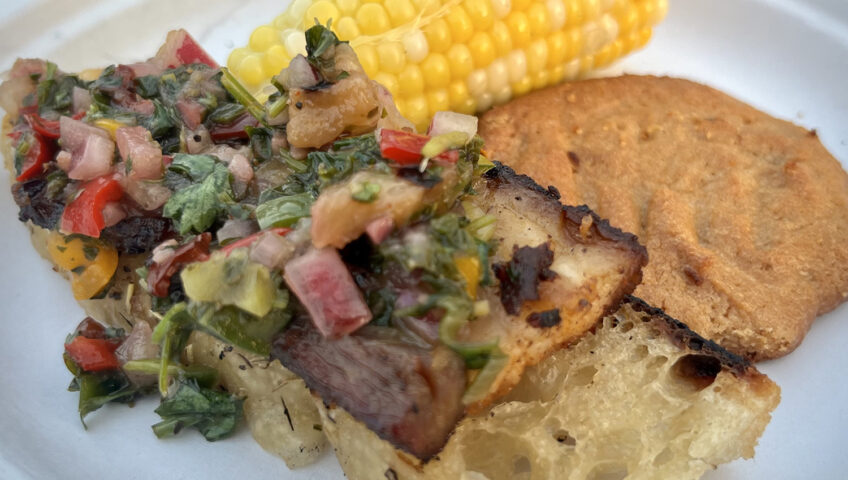
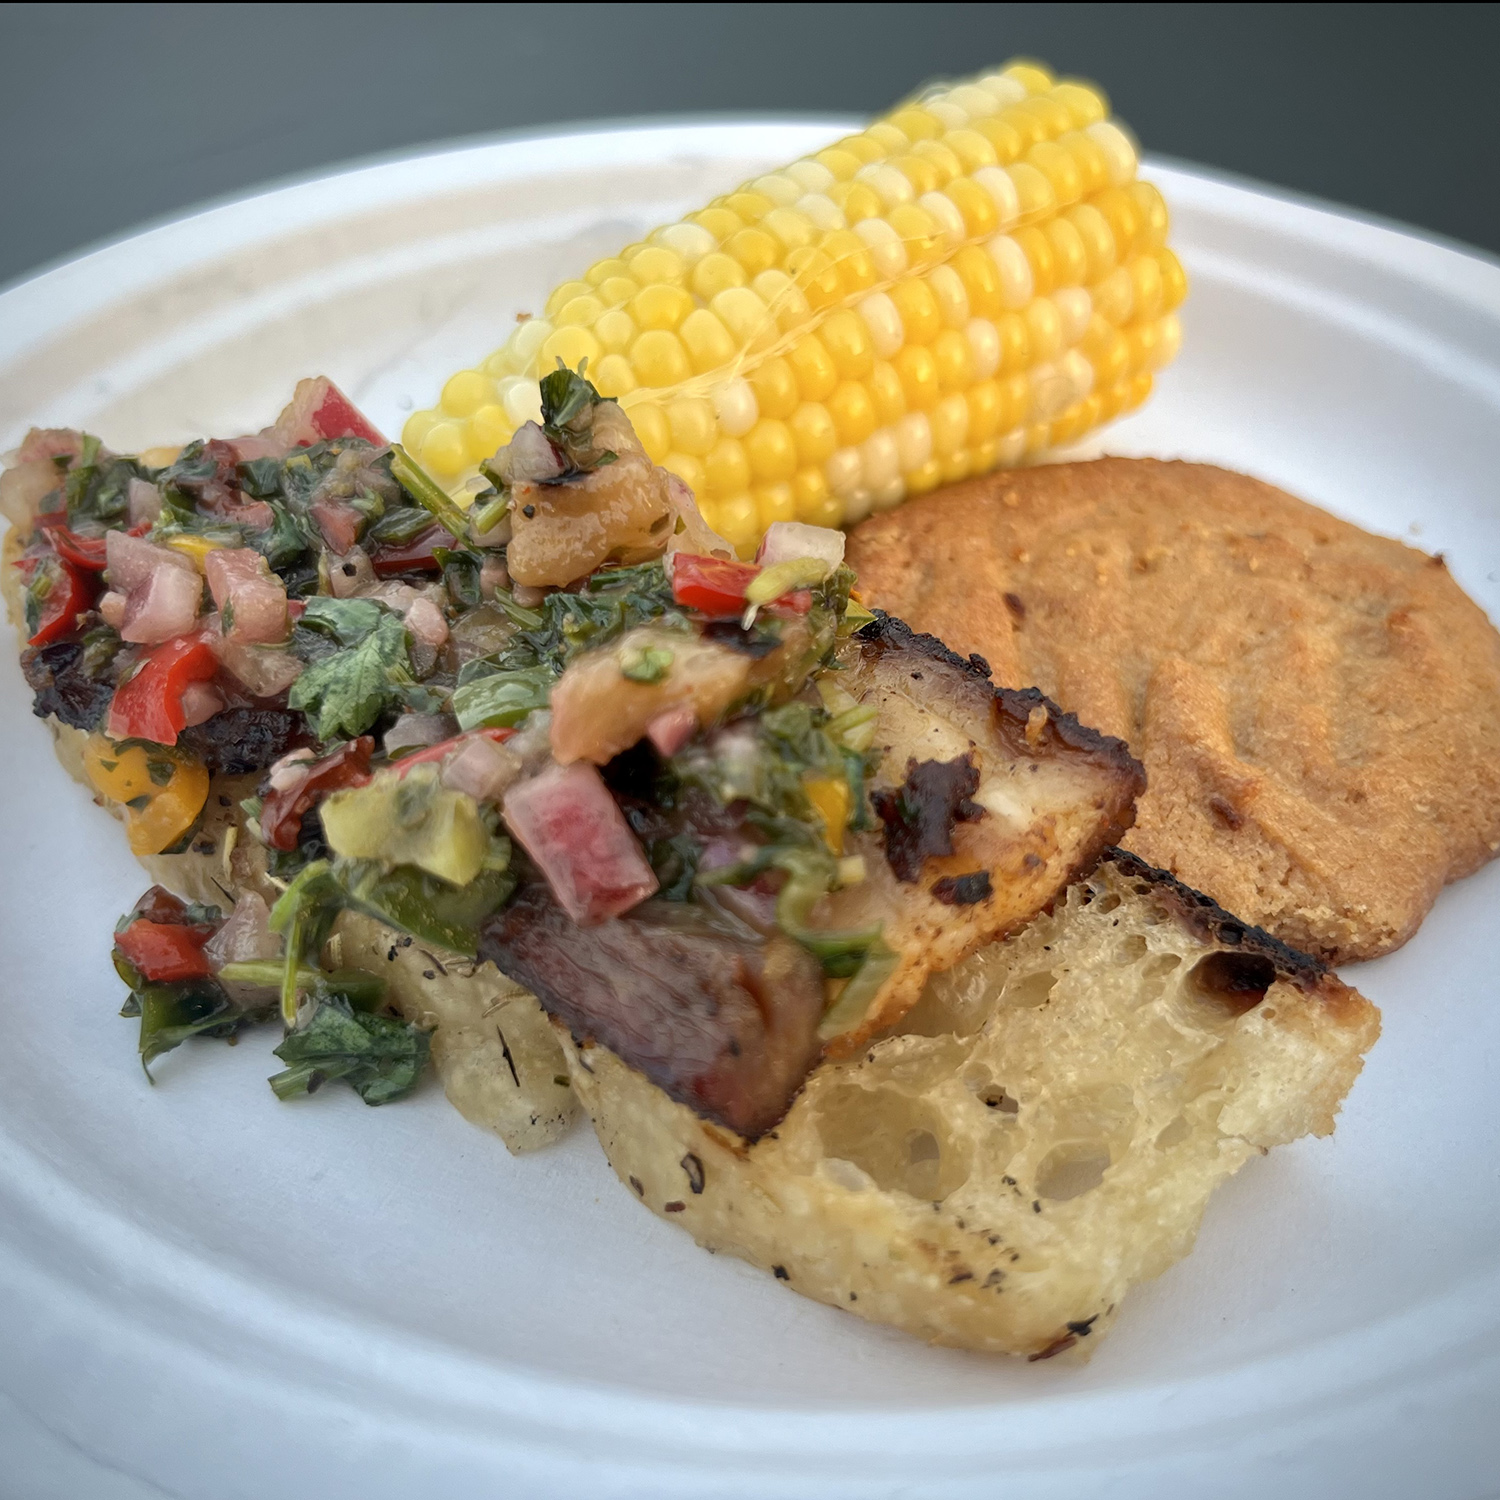
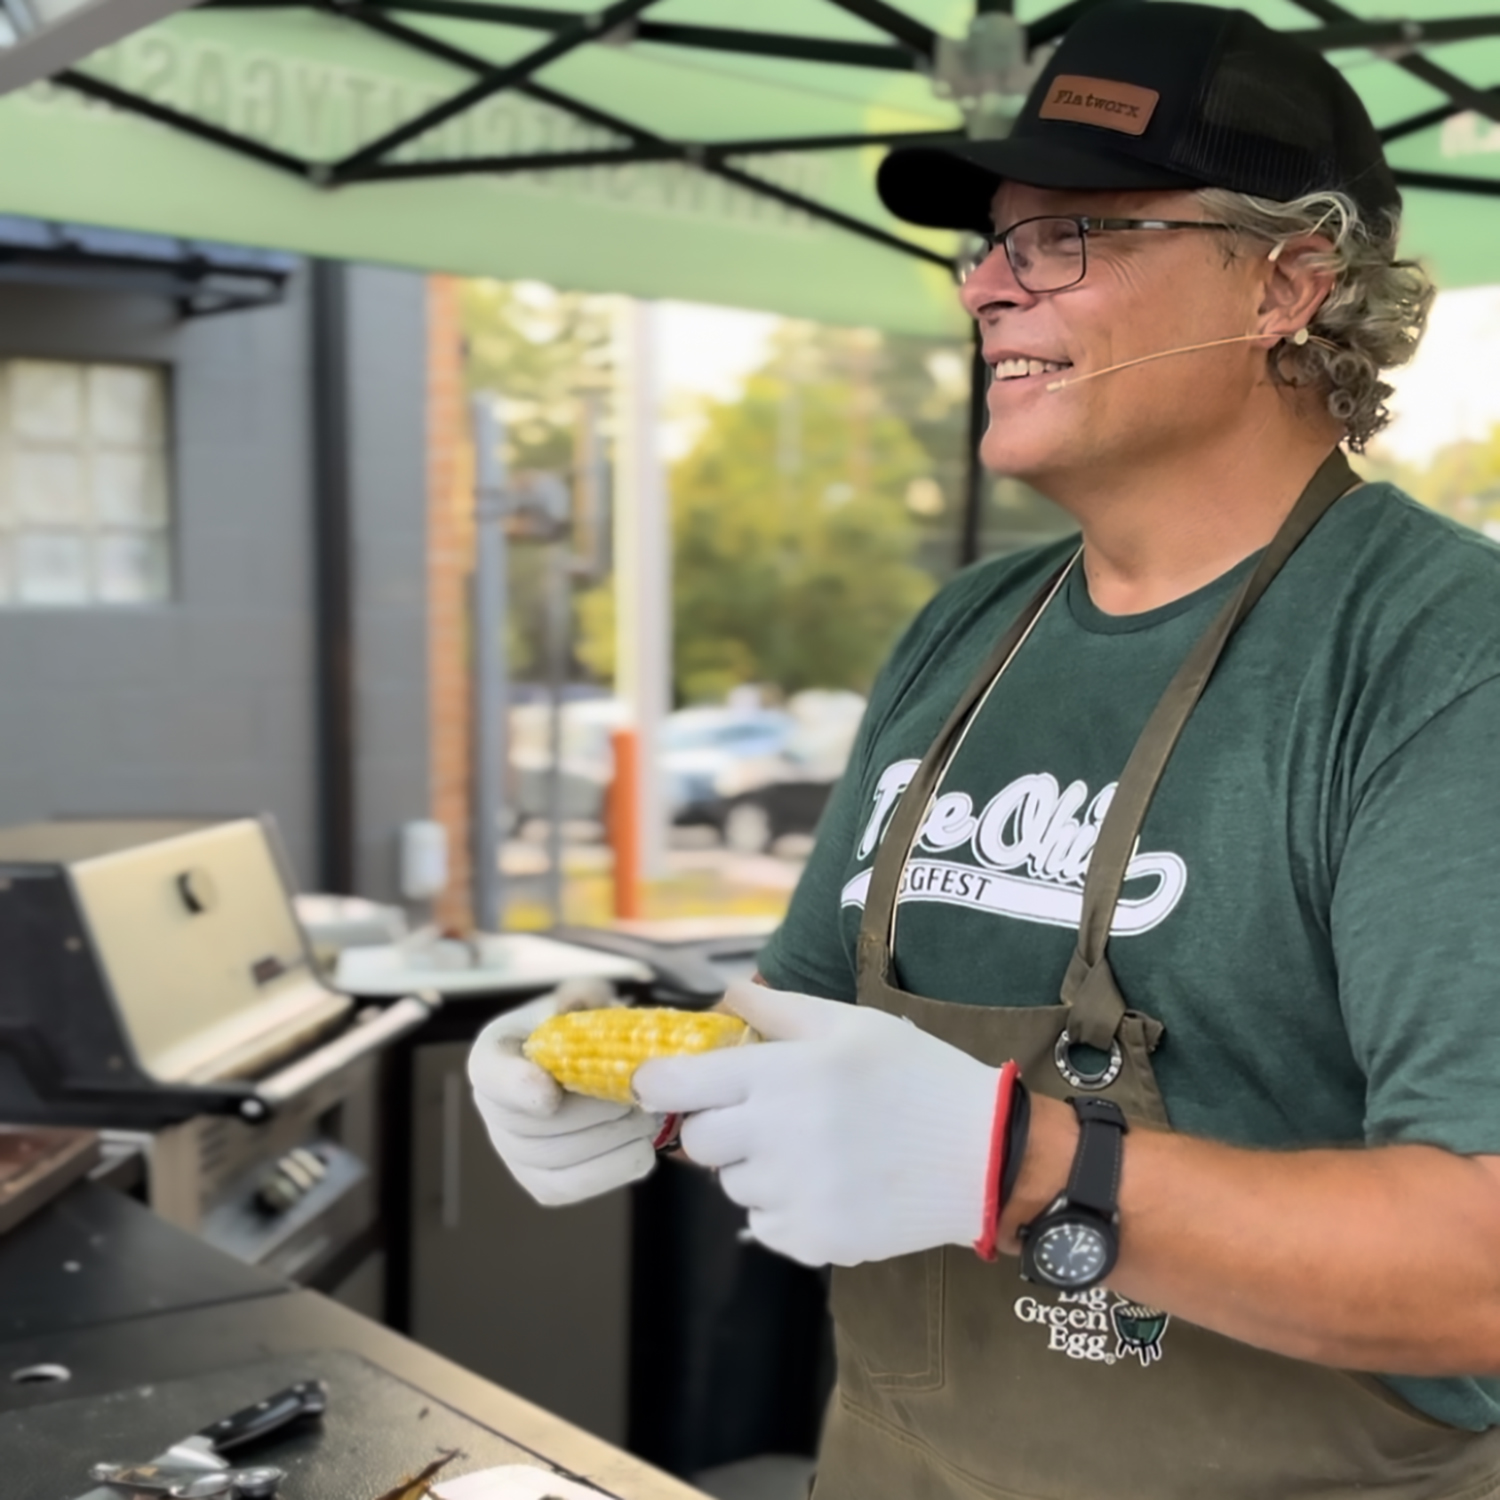
For this class we did something a little different, we didn’t bring in guest chefs, we hosted this class ourselves! We don’t have any formal training but when you are around grills enough you learn a thing or two. For this class, we demonstrated how to bake focaccia bread and roast pork belly on the Big Green Egg. We also did a simple grilled corn on the cob and 3 ingredient peanut butter cookies on the Big Green Egg. Give these a try and let us know what you think!

Grilling Class at Specialty Gas House 8/24/23


Focaccia Bread

Ingredients:

  • 4 cups (512 g) all-purpose flour or bread flour, see notes above
  • 2 teaspoons (10 g) kosher salt
  • 2 teaspoons (8 g) instant yeast, see notes above if using active dry
  • 2 cups (455 g) lukewarm water, made by combining 1/2 cup boiling water with 1 1/2 cups cold water
  • 2 tablespoons honey
  • butter for greasing
  • 4 tablespoons olive oil, divided
  • flaky sea salt
  • JJ’s Meat Fixin’s Rosemary Roastin Rub (Optional)

Directions:

  1. In a large bowl, whisk together the flour, salt, honey and instant yeast. Add the water. Using a rubber spatula, mix until the liquid is absorbed and the ingredients form a sticky dough ball. Rub the surface of the dough lightly with olive oil. Cover the bowl with plastic wrap and place in the refrigerator immediately for at least 12 hours or for as long as three days.
  2.  Line two 8 or 9 inch pie plates or a 9×13-inch pan with parchment paper or grease with butter or coat with nonstick cooking spray. Pour a tablespoon of oil into the center of each pan or 2 tablespoons of oil if using the 9×13-inch pan. Using two forks, deflate the dough by releasing it from the sides of the bowl and pulling it toward the center. Rotate the bowl in quarter turns as you deflate, turning the mass into a rough ball.
  3. Use the forks to split the dough into two equal pieces (or do not split if using the 9×13-inch pan). Place one piece into one of the prepared pans. Roll the dough ball in the oil to coat it all over, forming a rough ball. Repeat with the remaining piece. Let the dough balls rest for 3 to 4 hours depending on the temperature of your kitchen (Note: no need to cover for this room temperature rise).
  4. Set oven or Big Green Egg with covEGGtor to 425°F. (Here you can add seasoning/herbs to the top of the dough like JJ’s Rosemary Seasoning, fresh rosemary, garlic, tomato slices, etc.) Pour a tablespoon of oil over each round of dough (or two tablespoons if using a 9×13-inch pan).  Rub your hands lightly in the oil to coat, then, using all of your fingers, press straight down to create deep dimples. If necessary, gently stretch the dough as you dimple to allow the dough to fill the pan. Sprinkle with flaky sea salt all over.
  5. Transfer your pan to the oven or Big Green Egg and bake for 25 to 30 minutes, until the underside is golden and crisp. Remove the pan and transfer the focaccia to a cooling rack. Let it cool for 10 minutes before cutting and serving; let it cool completely if you are halving it with the intention of making a sandwich.


Roasted Pork Belly

Ingredients:

  • Whole Pork Belly (Approx. 8-10lbs) Costco usually has whole pork belly but you can also find them in smaller portions at Kroger.
  • JJ’s Original & JJ’s Smoked Chipotle Seasoning (Use your favorite pork seasoning)

Directions:

  1. Score fat cap.
  2. Gently caress your belly with oil.
  3. Season liberally with seasoning on all sides making sure to evenly coat your meat.
  4. Set Big Green Egg with ConvEGGtor or smoker to 250 degrees, once heated, place pork belly on the grid.
  5. Cook until an internal temperature of 195-200.
  6. Let rest, slice in ¼” slices and enjoy. You can also let cool in fridge, slice and place in pan/griddle to crisp up similar to bacon. 


Chimichurri Pork Sauce

Ingredients:

  • 3 cloves Finely Minced Garlic
  • ¼ cup Olive Oil
  • 2 tablespoons Apple Cider Vinegar (You can use balsamic or red wine vinegar)
  • 1 teaspoon Lime Juice
  • 1 tablespoon minced chives
  • 1 tablespoon cilantro
  • 1 tablespoon mint
  • 1 tablespoon parsley
  • 1 teaspoon mango nectar
  • 1 tablespoon sweet red peppers or red onions or both!
  • 1 tablespoon diced pineapple
  • Salt & Pepper to taste
  • (This is a very forgiving recipe, feel free to leave something out if you don’t like it or add extra of something if you like it more.)

Directions:

  1. Mix all of the ingredients and let sit for at least 30 minutes.


Grilled Corn on the Cob

Ingredients:

  • Some good ole Ohio Corn in husks (We got ours from The Hoover Farm, which is located at the corner of Vans Valley & Miller Paul roads in Galena. They sell by the honor system. Corn is sitting at the end of the driveway) 

Directions:

  1. Grill on low, roughly 350 degrees, in husks for approximately 14 minutes, turning 1-3 times.
  2. Remove from husk, add butter and seasoning if you want and enjoy!
  3. If having a party and you want to butter each corn easily, check out this hack that we used – https://healthstartsinthekitchen.com/butter-corn-cob-party/


3 Ingredient Peanut Butter Cookies

Ingredients:

  • 1 cup creamy peanut butter 
  • ¾ cup granulated sugar
  • 1 large egg
  • Optional: Sea Salt & Dash of Vanilla

Directions:

  1. Preheat oven or Big Green Egg with convEGGtor to 350°F. Line a baking sheet pan with parchment paper or butter.
  2. Using a spatula, mix the peanut butter, sugar, and egg together in a bowl until smooth and creamy. Here you can add a dash of vanilla if you’d like.
  3. Using a 1.5 tablespoon-size spring-loaded cookie scoop, scoop cookies on the baking sheet pan about 2 inches apart. Flatten each into a smooth round shape and then use the back of a fork, making a criss-cross pattern. You can add a pinch of sea salt on each cookie here if you’d like.
  4. Bake for 10-12 minutes, or until the cookies are golden brown.
  5. Let sit for about 2 to 3 minutes on the pan, then transfer to a cooling rack until completely cool. 


Comments/Questions

We’d love to hear from you! Give us a comment on what you thought or if you have any questions. Check our grilling class calendar to join us at our next one! 

Grilling Classes


Smoke & Fire Festival Recipes

Recipes from our dish at The Smoke & Fire Festival in Bexley – 8/26/23

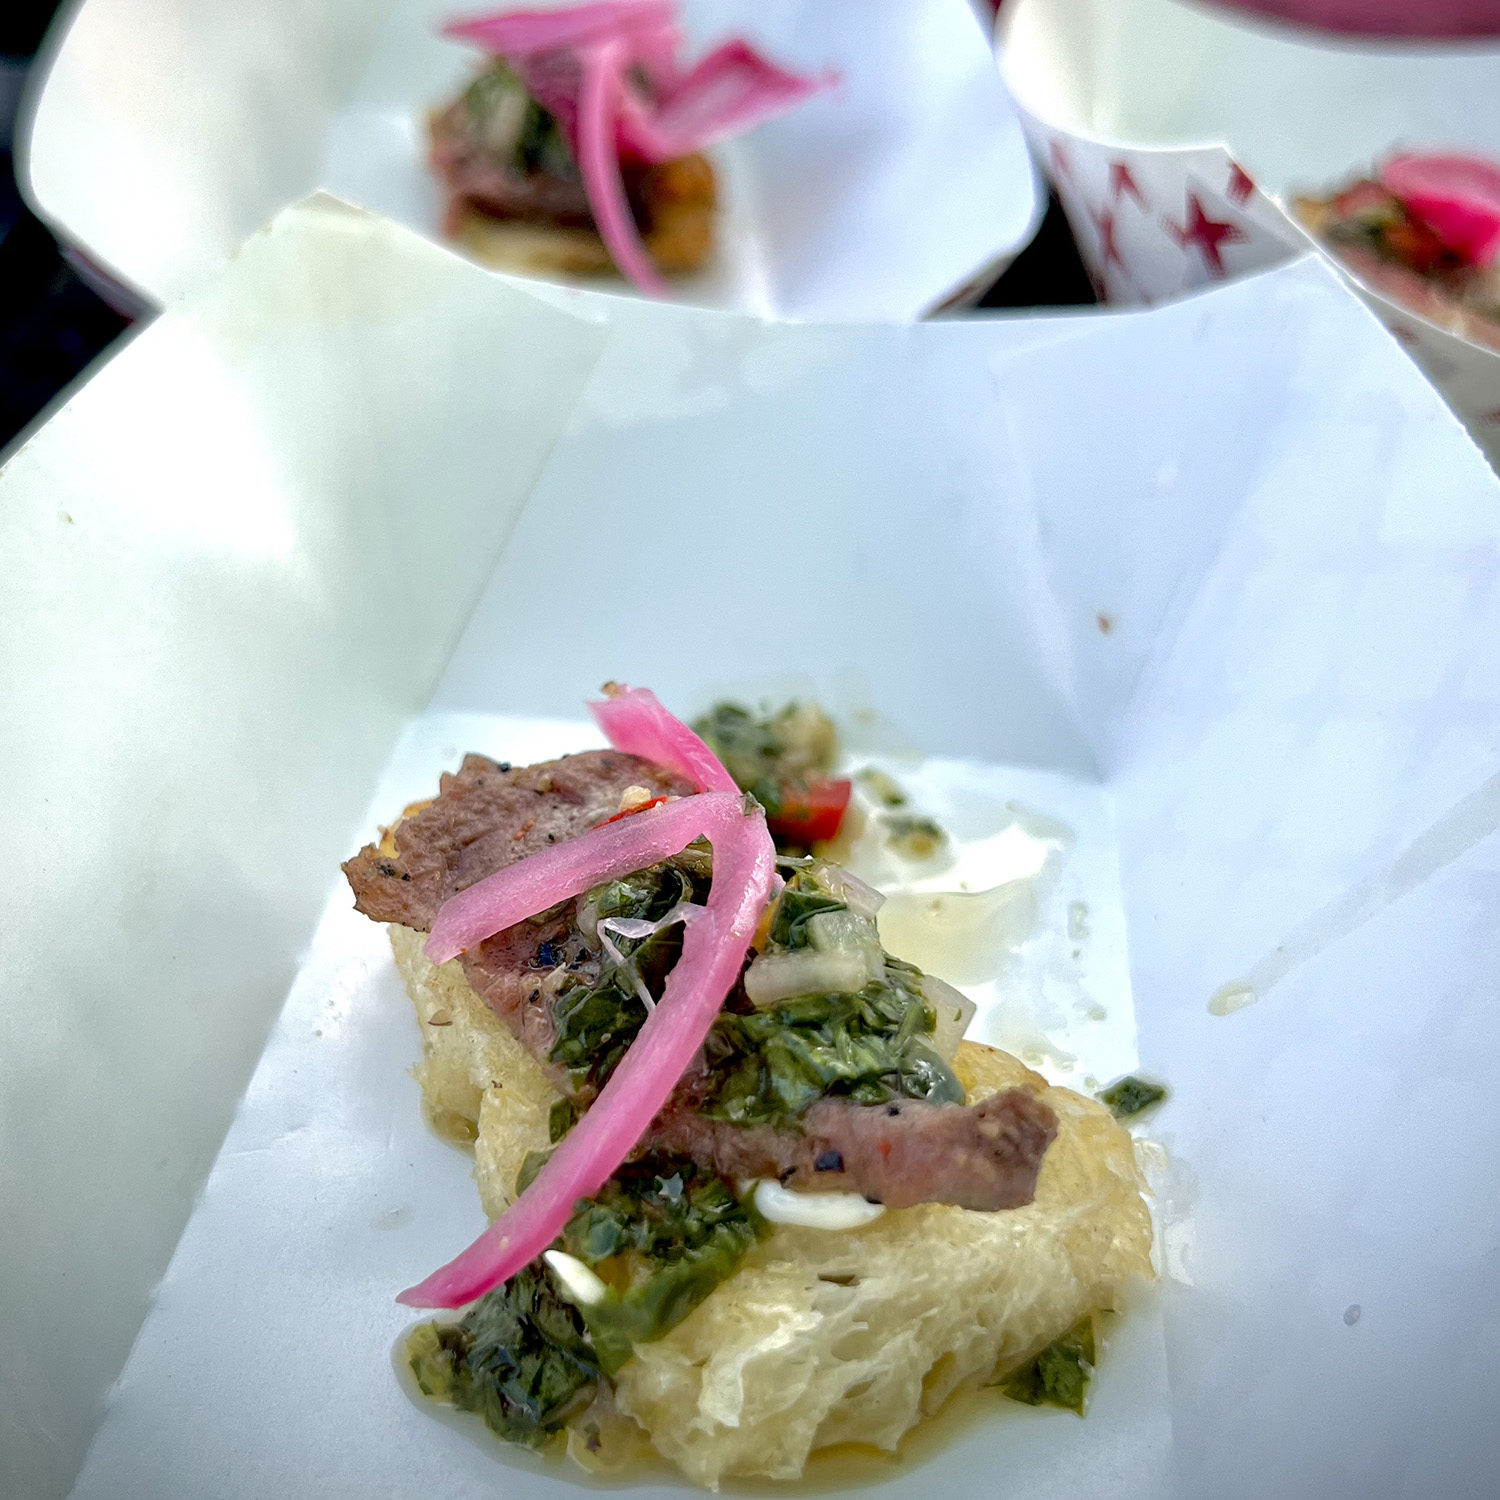
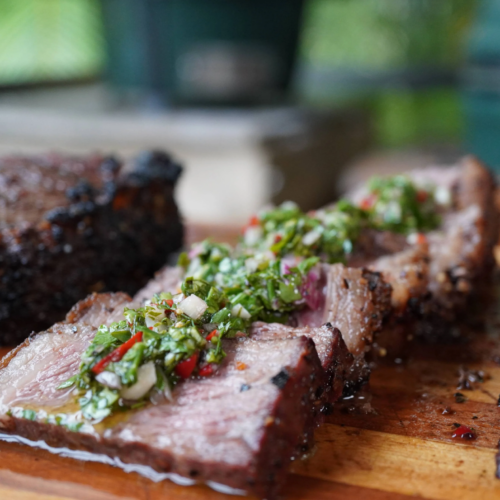
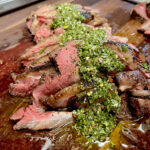
Our dish at the Smoke & Fire Festival was garlic focaccia bread that had a small spread of Duke’s mayonnaise on it, which was then topped with reverse-seared picanha steak, homemade chimichurri and pickled red onions. This dish won us first place! The recipes for each individual item is below, all you have to do is assemble the sandwich or make it an appetizer with small bites like we did at this festival.

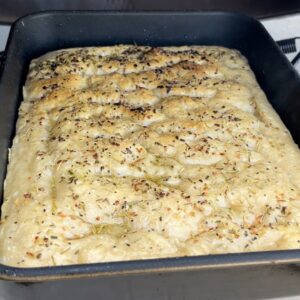
focaccia bread recipe

Focaccia Bread

Ingredients
  

  • 4 Cups (512 g) Bread Flour
  • 2 TSP (10g) Kosher Salt
  • 2 TSP (8g) Instant Yeast
  • 2 Cups Lukewarm Water
  • 2 TBS Honey or Agave
  • 4 TBS Olive Oil
  • Butter for greasing

Optional

  • Herbs, garlic, tomatoes, etc to top bread with

Instructions
 

  • In a large bowl, whisk together the flour, salt, honey and instant yeast. Add the water. Using a rubber spatula, mix until the liquid is absorbed and the ingredients form a sticky dough ball. Rub the surface of the dough lightly with olive oil. Cover the bowl with plastic wrap and place in the refrigerator immediately for at least 12 hours or for as long as three days.
  • Line two 8 or 9 inch pie plates or a 9×13-inch pan with parchment paper or grease with butter or coat with nonstick cooking spray. Pour a tablespoon of oil into the center of each pan or 2 tablespoons of oil if using the 9×13-inch pan. Using two forks, deflate the dough by releasing it from the sides of the bowl and pulling it toward the center. Rotate the bowl in quarter turns as you deflate, turning the mass into a rough ball.
  • Use the forks to split the dough into two equal pieces (or do not split if using the 9×13-inch pan). Place one piece into one of the prepared pans. Roll the dough ball in the oil to coat it all over, forming a rough ball. Repeat with the remaining piece. Let the dough balls rest for 3 to 4 hours depending on the temperature of your kitchen (Note: no need to cover for this room temperature rise).
  • Set oven or Big Green Egg with covEGGtor to 425°F. (Here you can add seasoning/herbs to the top of the dough like rosemary, garlic, tomato slices, etc.) Pour a tablespoon of oil over each round of dough (or two tablespoons if using a 9×13-inch pan).  Rub your hands lightly in the oil to coat, then, using all of your fingers, press straight down to create deep dimples. If necessary, gently stretch the dough as you dimple to allow the dough to fill the pan. Sprinkle with flaky sea salt all over.
  • Transfer your pan to the oven or Big Green Egg and bake for 25 to 30 minutes, until the underside is golden and crisp. Remove the pan and transfer the focaccia to a cooling rack. Let it cool for 10 minutes before cutting and serving; let it cool completely if you are halving it with the intention of making a sandwich.
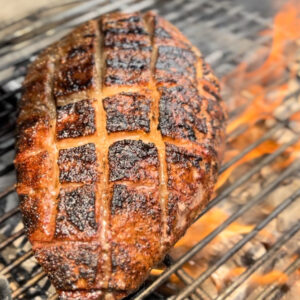
picanha steak

Reverse Seared Picanha Steak

Ingredients
  

  • Picanha Steak or Tri Tip
  • Lane's Brisket Rub You can also use a mixture of salt, pepper & garlic powder
  • Meat Thermometer

Instructions
 

  • Pat down the meat to make sure that it’s dry from any excess moisture. Score the fat cap 1/8″ in a criss-cross pattern and generously season all sides with your seasoning. 
  • Set your grill for indirect heat, or preheat your smoker. You want to maintain 225-250˚F. Cook the picanha for roughly 60-90 minutes until the internal temperature is 115°F (medium rare prep). Remove the meat from the grill, and turn the heat up to 450-500°F.
  • Sear the meat, flipping frequently to control the momentum of the temperature. The fat cap may flare up. Once you have the perfect crust and your internal temperature is ready (130-135°F medium rare) remove the picanha and allow it to rest for at least 10 minutes, tented under foil.
  • Slice against the grain and enjoy!
Chimichurri recipe on steak

Chimichurri

Ingredients
  

  • 1/3 Cup Olive Oil
  • 2 TBS Red Wine Vinegar
  • 1/4 Cup Finely Chopped Fresh Italian Parsley
  • 1/4 Cup Finely Chopped Fresh Cilantro
  • 3-4 Cloves Finely Minced Garlic
  • 2 TBS Chopped Red Bell Pepper
  • 3/4 TSP Dried Oregeno
  • Salt & Pepper to taste
  • 1 TSP Hot Sauce Optional

Instructions
 

  • Mix all ingredients and let sit for at least 30 minutes. 24 hours is ideal. Then enjoy on beef, chicken, vegetabes and more.
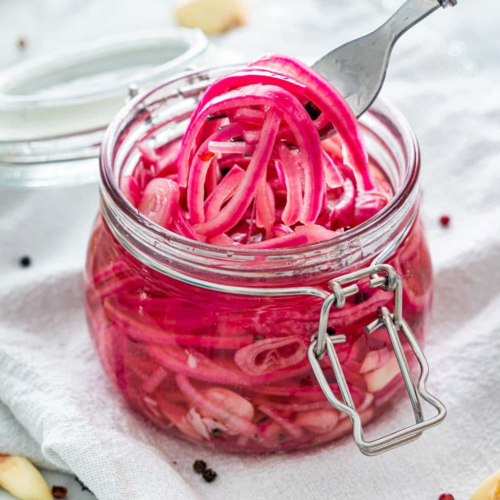
pickled red onions recipe

Pickled Red Onions

Ingredients
  

  • 2 Sma;ll Red Onions
  • 2 Cups White Vinegar
  • 2 Cups Water
  • 1/3 Cup Cane Sugar
  • 2 TBS Sea Salt

Instructions
 

  • Thinly slice the onions and divide the onions between (2) 16oz Jars
  • Heat the vinegar, water, sugar, and salt in a medium saucepan over medium heat. Stir until the sugar and salt dissolve, about 1 minute. Let cool and pour over the onions. Set aside to cool to room temperature, then store the onions in the fridge.
  • Your pickled onions will be ready to eat once they're bright pink and tender – about 1 hour for very thinly sliced onions, or overnight for thicker sliced onions. They will keep in the fridge for up to 2 weeks.
Chef Latonya Bolling free grilling class at specialty gas house

Grilling Class with Chef Latonya Bolling

Grilling Class with Chef Latonya Bolling – Tonya Bees

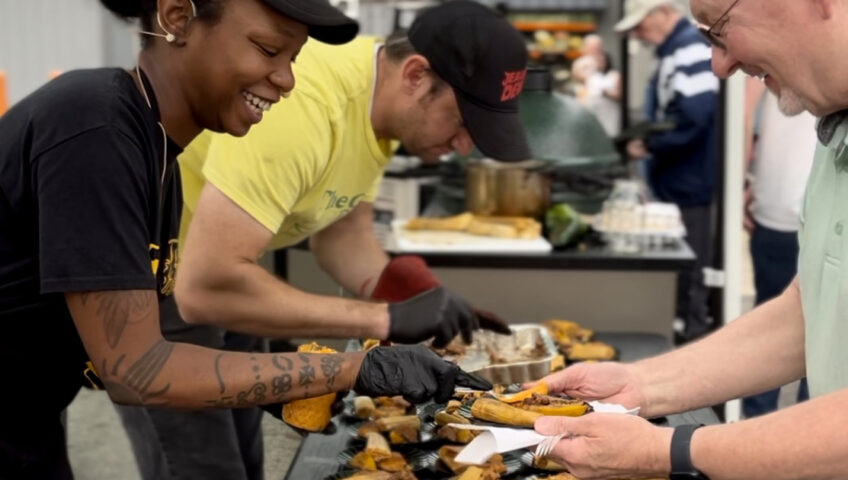
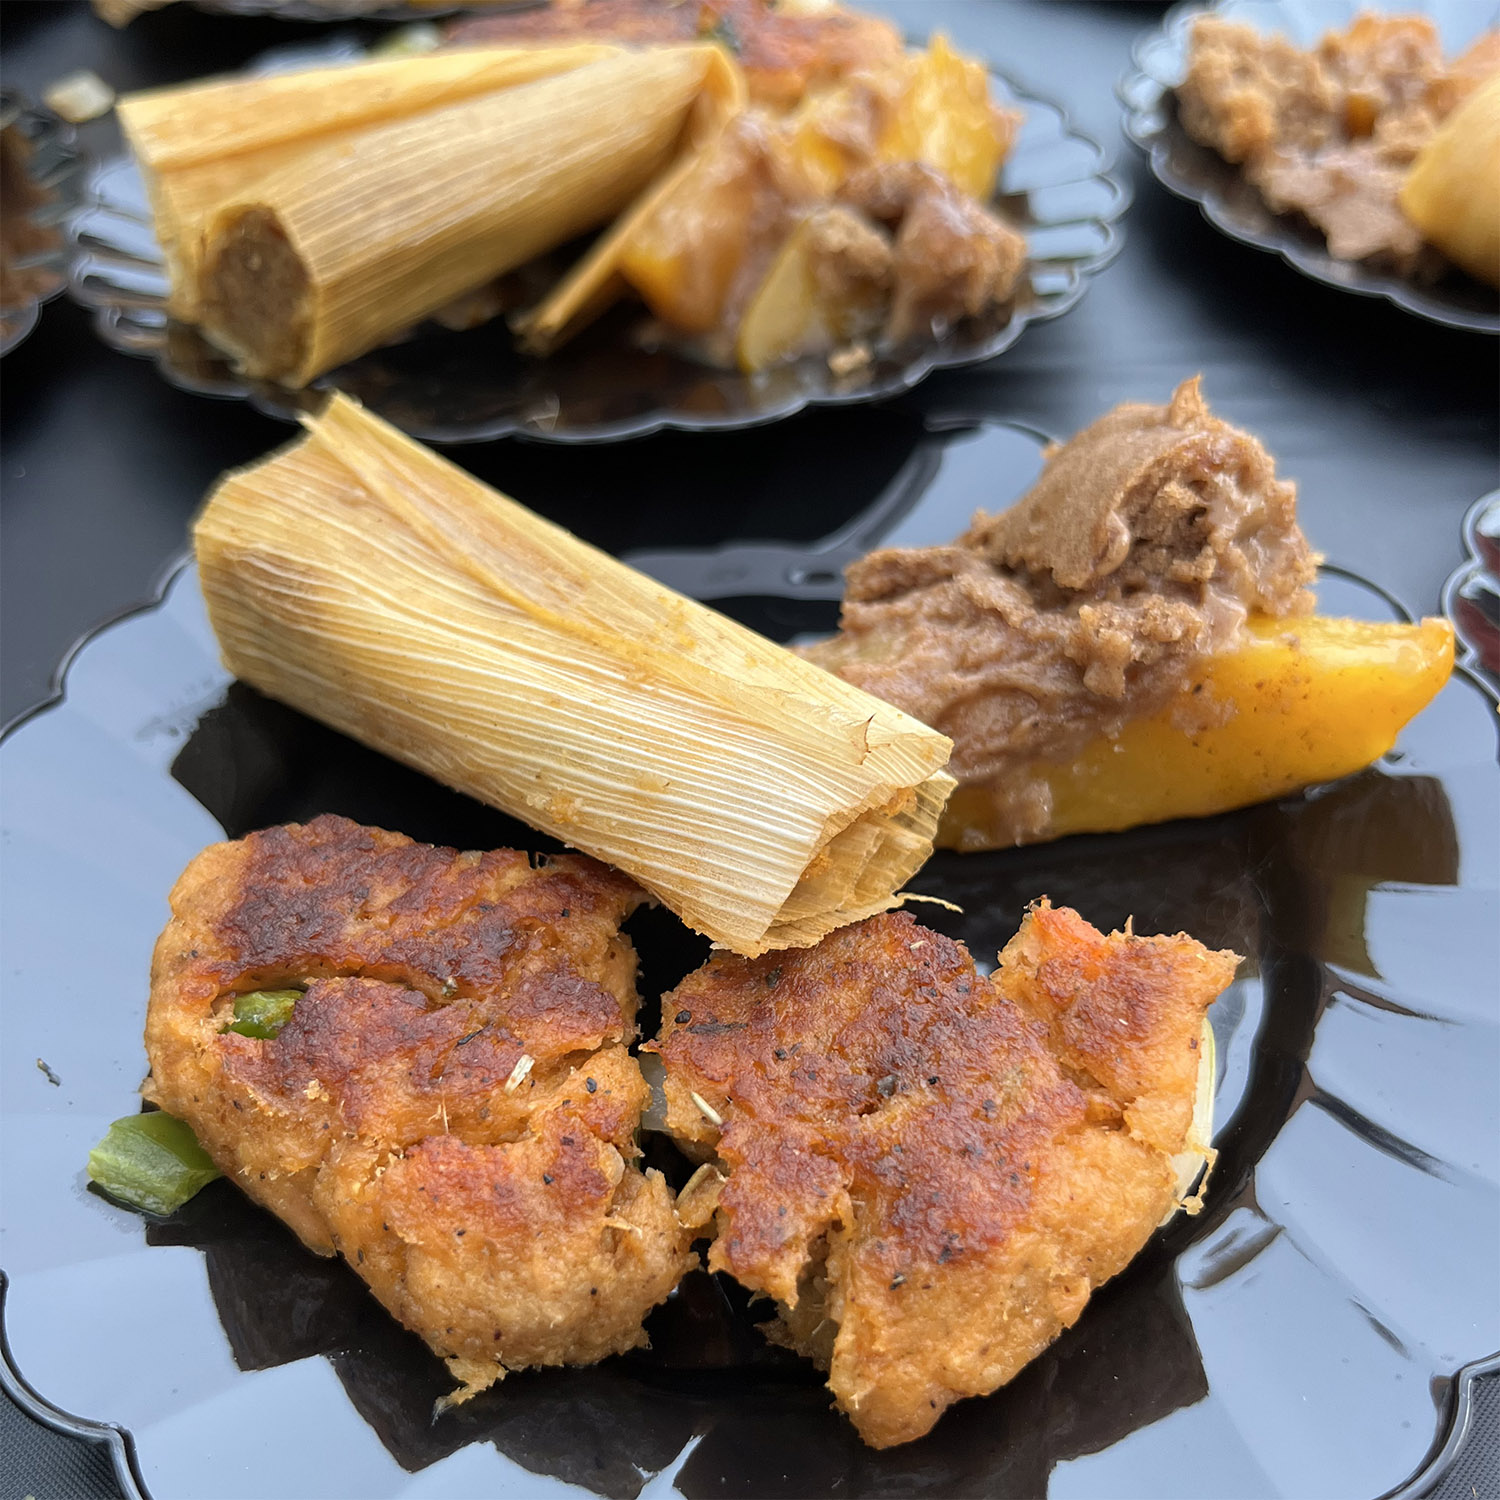
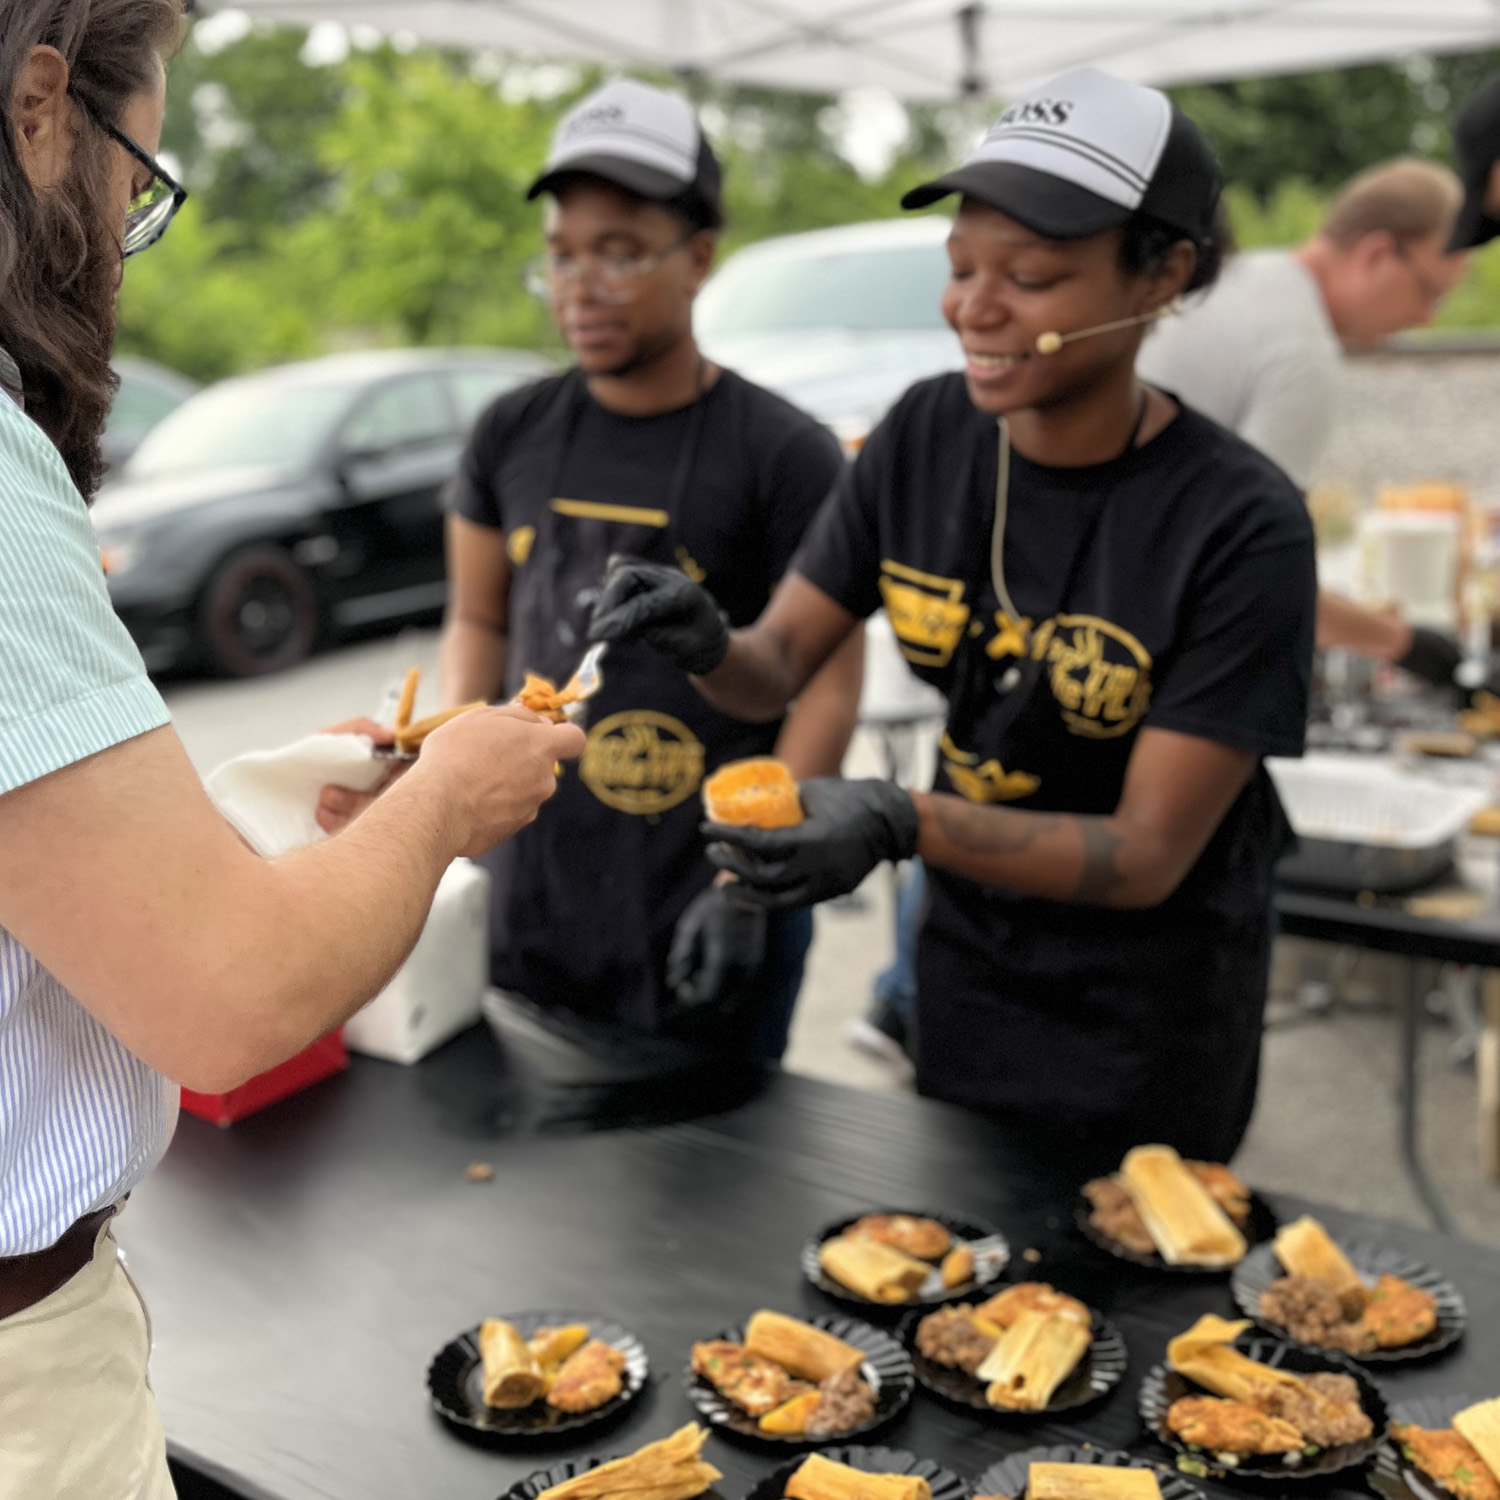
We had the pleasure of welcoming Chef Latonya Bolling to host our 2023 June Grilling Class! Chef Latonya demonstrated her Southern Mississippi Delta Heritage for this class. This class featured recipes for Salmon Croquettes, Smoked Peach Cobbler & Mississippi Delta Hot Tamales. Latonya knows her way around a grill, these recipes were delicious, take a look at them below and try them for yourself!

Chef Latonya Bolling Grilling Class at Specialty Gas House 6/15/23


Salmon Croquettes

Ingredients:

  • ½ Pound Salmon
  • 1 Egg
  • ¼ cup mayo
  • 1 tbsp mustard
  • ½ cup of Tonya Bee’s Southern Croquette Mix (Substitute with bread crumbs and seasoning to
    taste)
  • ¼ cup of chopped onion
  • ¼ cup of chopped bell pepper
  • ¼ cup of chopped poblano pepper

Directions:

  1. Rub your salmon with a mixture of olive oil and liquid crab boil. Smoke your salmon for an hour at 250 degrees or until it reaches an internal temperature of 145 degrees.
  2. Flake Salmon in a mixing bowl. Add chopped veggies, mustard, mayo, and egg then stir. Add your Tonya Bee’s Southern Croquette Mix. Your mixture should not stick to your hands and should be moldable.
  3. Form your patties and fry them or grill them on medium-high for 5 minutes on each side or until they are cooked to your liking.

Peach Cobbler

Ingredients:

  • 1 Can of sliced peaches
  • 1 tbsp of butter
  • 2 tbsp Tonya Bee’s Peach Cobbler Seasoning (Substitute with cinnamon, nutmeg, and a tsp of
    corn starch)
  • ¼ cups of Tonya Bee’s Peach Cobbler Topping Mix (Substitute with 2tbsp flour, 2tbsp sugar)
  • 1 tbsp hot water

Directions:

  1. Drain a can of sliced peaches and season with Tonya Bee’s Peach Cobbler Seasoning and mix well.
  2. In a bowl squeeze your butter into your Tonya Bee’s Peach Cobbler Topping Mix until absorbed.
  3. Pour hot water into the mixture a little at a time until you have a soft, fluffy, and thick mixture.
  4. Place your peaches into a ramekin and top them with your topping mixture.
  5. Place on the grill to smoke at 300 degrees for 30-45 minutes or until your topping is at a satisfactory texture.


Mississippi Delta Hot Tamales

Ingredients:

  • 2 Pounds of pork shoulder
  • 1 onion
  • 8 cloves of garlic
  • ¼ cup of oil
  • 4 cups of corn meal
  • ¼ cup of lard
  • 1 teaspoon of baking powder
  • 1 cup of chili powder
  • 1 tbsp ground cumin
  • 1 tbsp paprika
  • 1 tbsp black pepper
  • 1 tsp salt
  • Corn Husk
  • Jute Cord
  • 1tsp cayenne

Directions:

  1. Flat boil your pork shoulder for 2-3 hours or until you can easily pull it apart.
  2. While your pork is cooking place corn husks into a bowl and cover with warm water, let them soak for 2 hours.
  3. Retain the liquid from the pork. Once cooled, remove the fat from your pork and ruff chop.
  4. Whip your lard with your baking powder and salt until it’s fluffy. Place the mixture in the refrigerator for at least 30 minutes.
  5. While your lard is cooling, heat your oil and add your onions and garlic. Let it cook until it is translucent then add your seasonings and remove it from
    heat.
  6. Mix 4 cups of cornmeal with the whipped lard. Add ¼ cup of your seasoning mix to the cornmeal mix. Also, add ¼ cup of the pork broth you retained earlier.
  7. Mix your chopped meat with the rest of your seasoning mix.
  8. Add your cornmeal to your corn husk leaving ¼ inch of space around the edges. Add your meat to the middle of the corn husk, roll, bunch and tie them off in groups of 3.
  9. Add a tsp of cumin, cayenne, and paprika to the remaining pork broth. Place the tamales right side up in the liquid. Be sure to place them where they won’t fall. Add water if needed to bring the liquid about an inch away from the top of the shortest tamale. Bring to a boil and then reduce to low heat.
  10. Cover and cook for an hour or until the cornmeal pulls easily away from the corn husk.


Comments/Questions

We’d love to hear from you! Give us a comment on what you thought or if you have any questions. Check our grilling class calendar to join us at our next one! 

Grilling Classes


Grilling Class with Chef Dan Varga

Grilling Class with Chef Dan Varga – The Hungarian Butcher

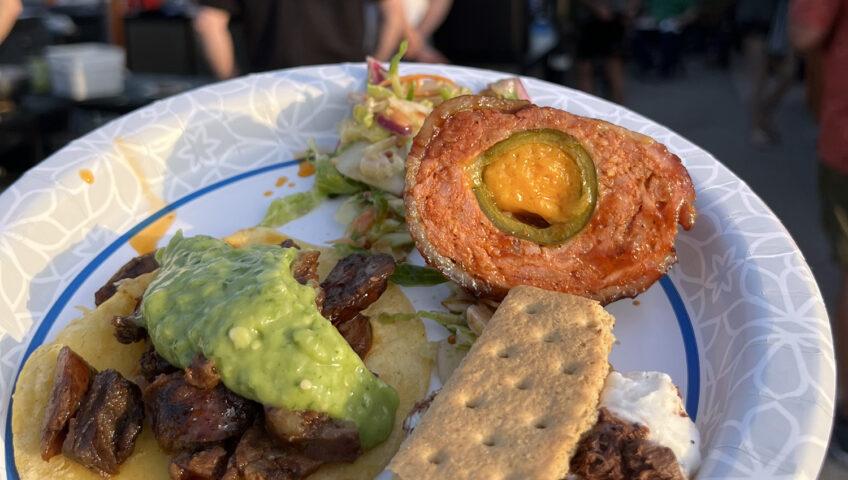
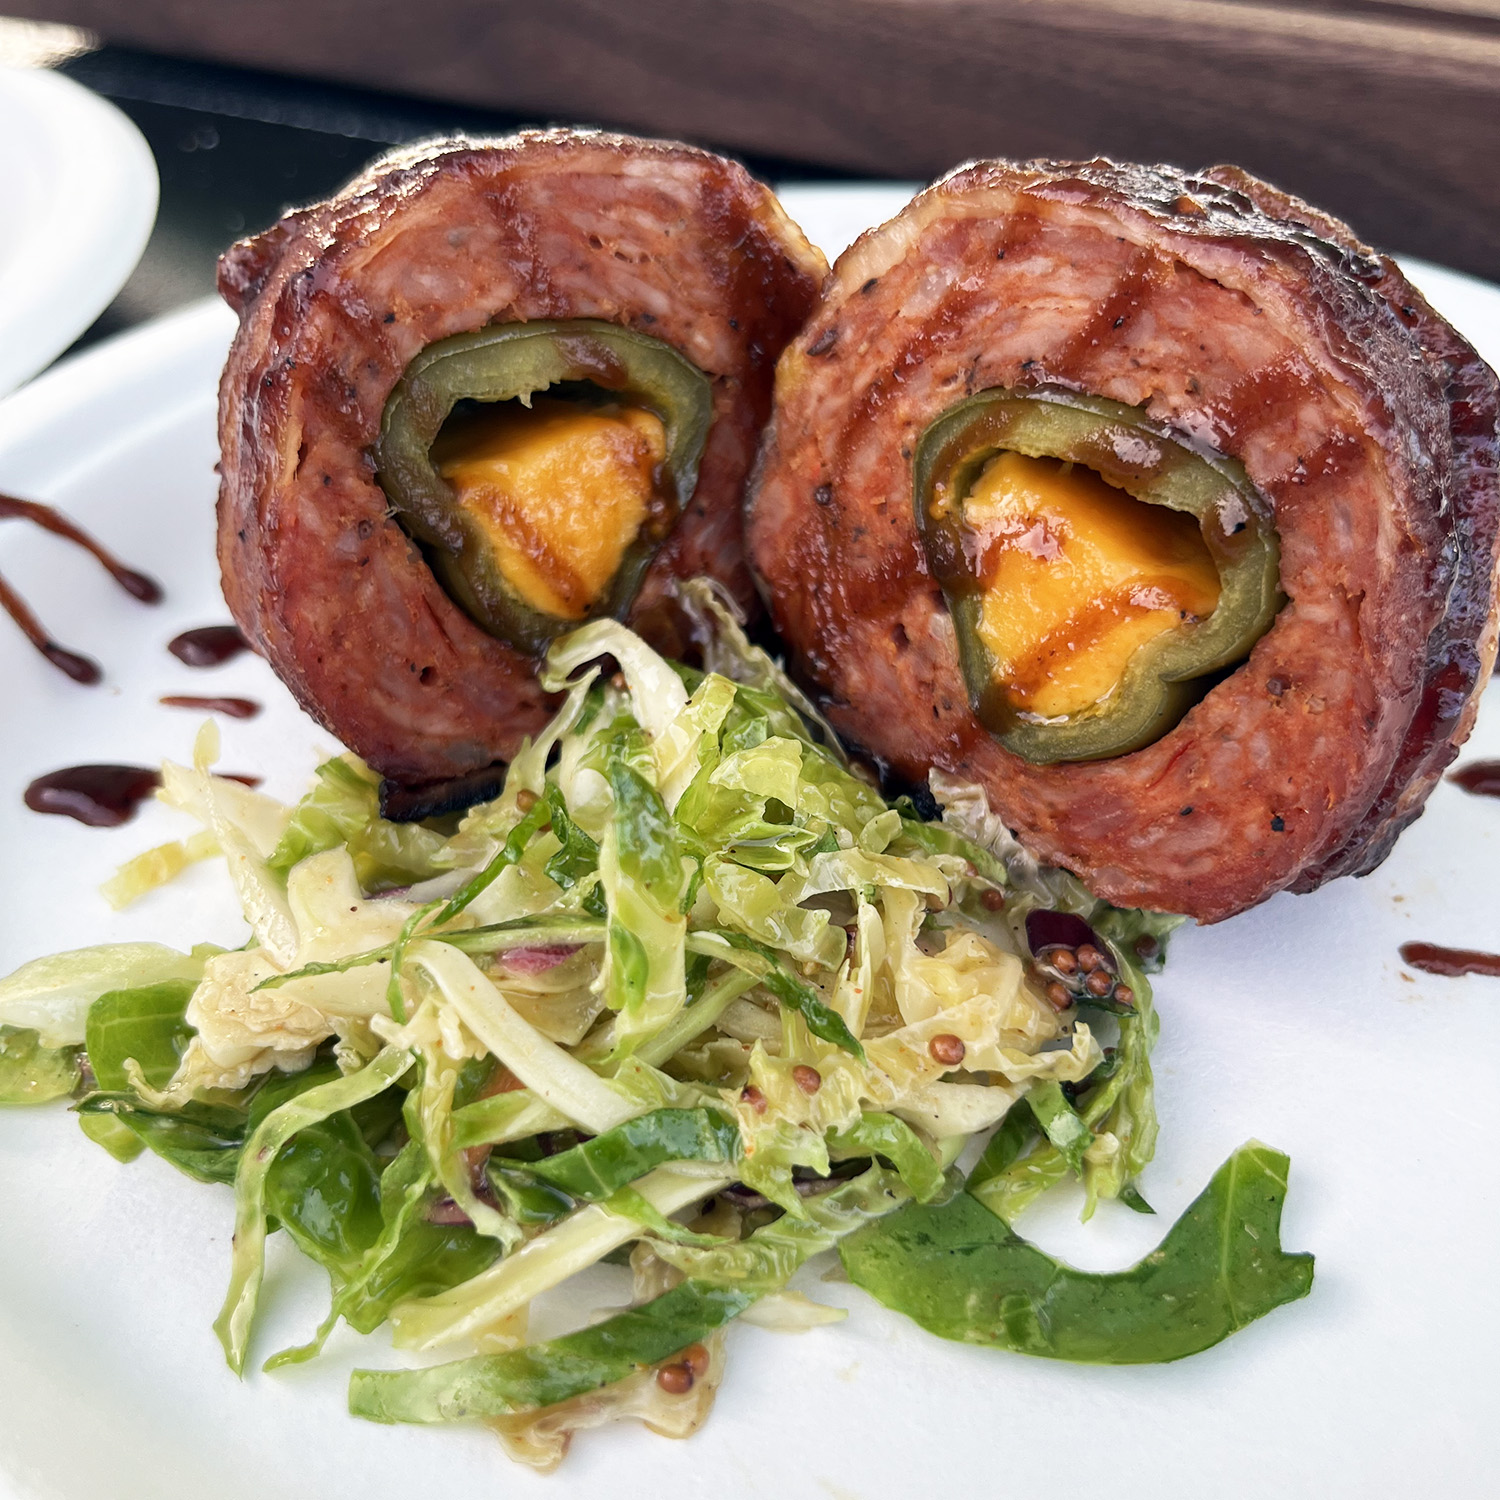
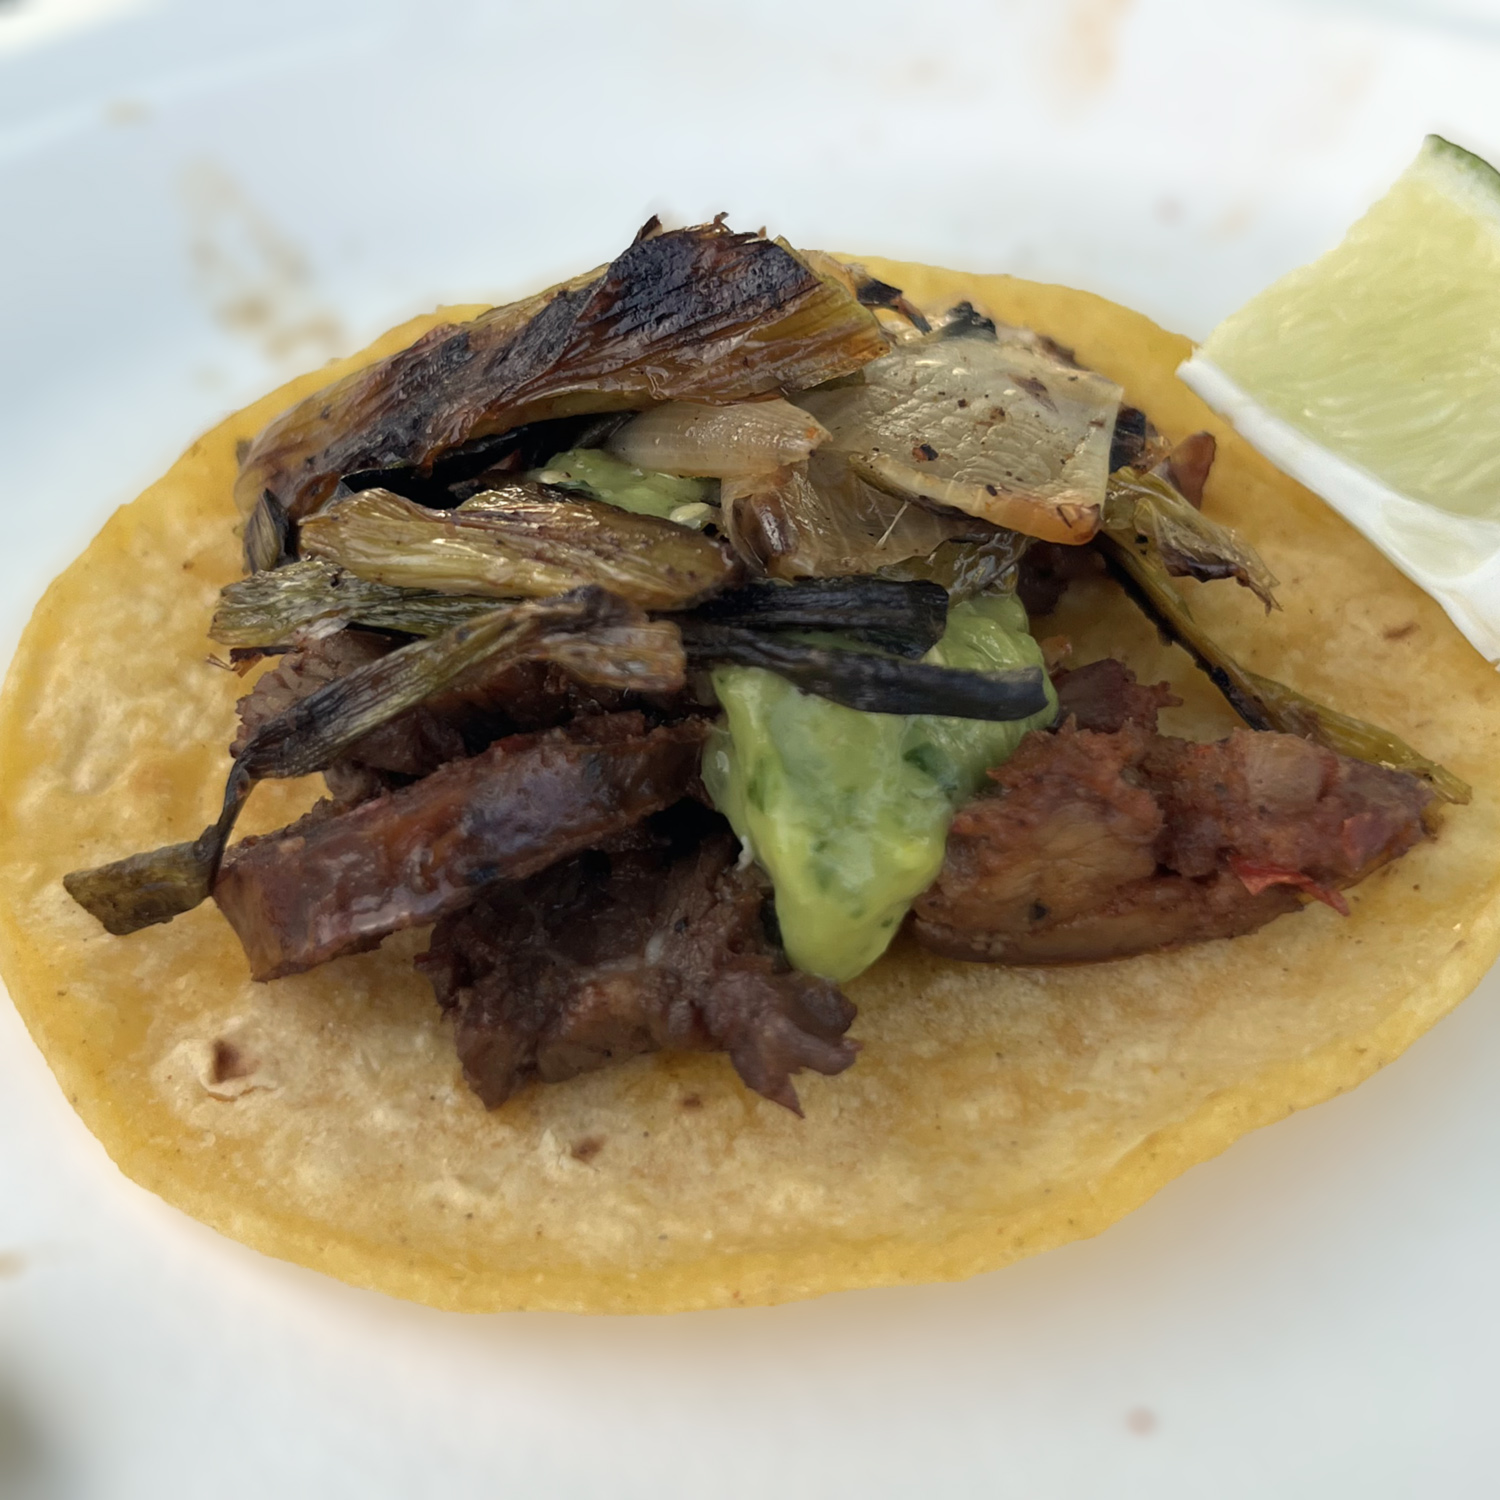
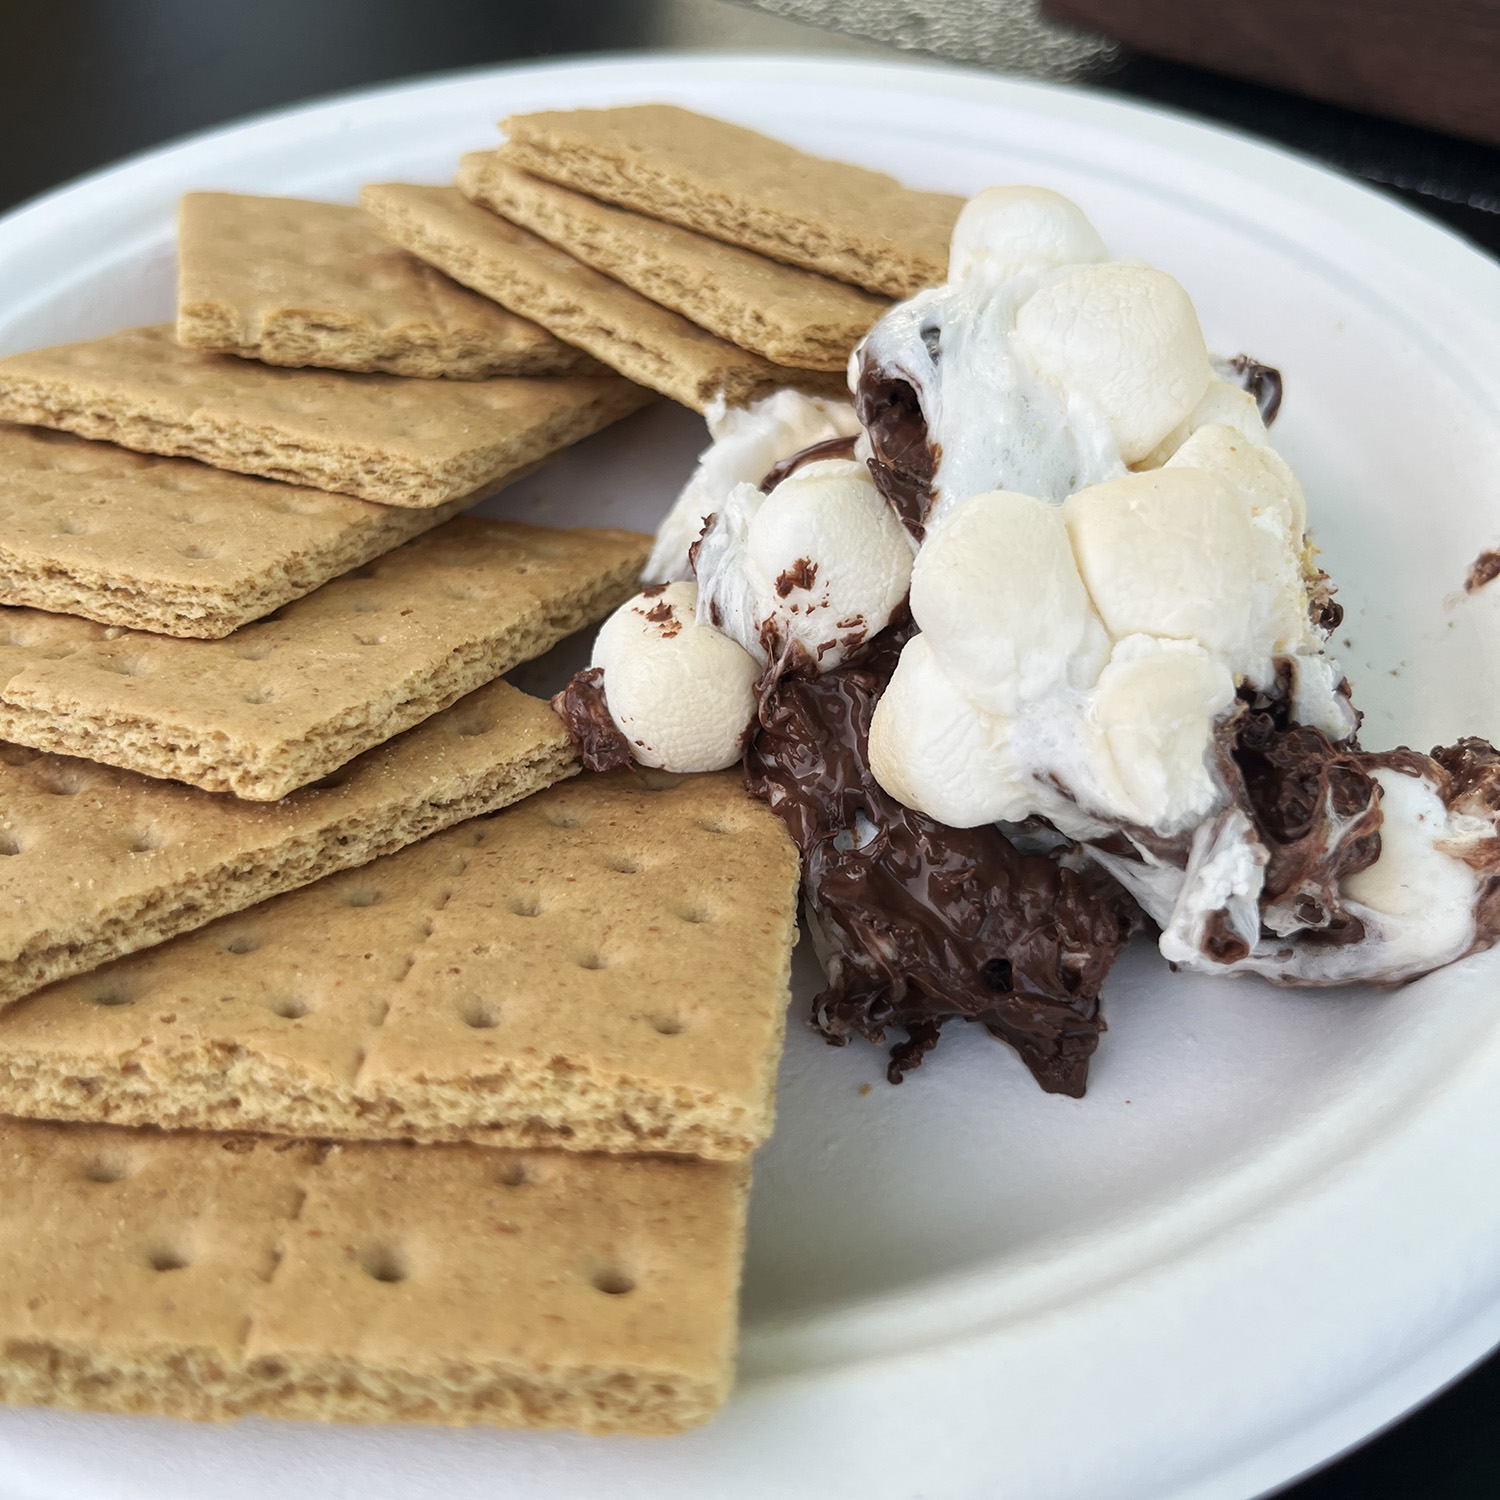
We had the pleasure of welcoming Chef Dan Varga, the esteemed owner and head butcher of The Hungarian Butcher in Worthington, to kick off our first grilling class of 2023!! This was a filled to capacity class that featured some incredible recipes! Chef Dan demonstrated recipes for Amardillo Eggs, brussels sprout slaw, Tacos Campechanos, and smoked smores dip. These were absolutely delicious, take a look at the recipes below and give them a try for yourself! Make sure to stop by The Hungarian Butcher to visit Chef Dan and to pick up some of the best meat in the city!

Chef Dan Varga Grilling Class at Specialty Gas House 5/11/23


Armadillo Eggs

Ingredients:

  • 2# Ground Pork
  • 1 TBS Salt
  • ½ TBS Pepper
  • 1 TBS Garlic

Put into a bowl and mix until sticky

  • 8 Jalapenos Whole & Gutted
  • 8- 1oz Sticks Cheddar
  • 8 Slices of Bacon

Directions:

  1. Mix Sausage & Chill
  2. Stuff Jalapenos with Cheese
  3. Weigh out Sausage in 8 equal parts
  4. Form Sausage around Jalapeno
  5. Wrap with Bacon
  6. Smoke at 225 degrees for 1 ½ hours until internal temperature of 150 degrees
  7. Dip whole Egg in BBQ sauce of choice
  8. Place back in smoker for 30 mins

Brussels Sprout Slaw

Ingredients:

  • 1# Shredded Brussel Sprouts
  • 2 Sliced Radish
  • 1 Julienned Shallot
  • 1 Shredded Carrot
  • 1 cup Shredded Red Cabbage
  • 1TBS Whole Grain Mustrard
  • 1 TBS Dijon Mustard
  • 1 TBS Hungarian Mustard (sold at Hungarian Butcher)
  • ½ cup Brown Sugar
  • ½ cup Apple Cider Vinegar
  • ½ cup Olive Oil
  • 1 TBS JJ’s Chipotle Carolina Spice
  • Salt and Pepper to taste

Directions:

  1. Place Slaw mixture in bowl
  2. Mix all ingredients together and chill for 1-2 hours
  3. Enjoy!

Tacos Campechanos

Ingredients:

  • ½ # Carne Asada
  • ½ # Longaniza
  • ½ cup Guacamole
  • Corn Tortillas
  • Fresh Limes
  • Onions and Cilantro (optional)

Directions:

  1. Grill Carne Asada and Longaniza
  2. Grill or griddle Tortillas
  3. Build Tacos
  4. Garnish with guacamole, lime and optional cilantro and onions
  5. Enjoy!

Smoked Smores Dip

Ingredients:

  • 1# Chocolate Chips or Chocolate Bars
  • ½ Bag Marshmallows
  • Graham Crackers
  • Cast Iron Skillet

Directions:

  1. Put Chocolate in the bottom of the skillet
  2. Put Marshmallows on top of the chocolate
  3. Place skillet into smoker until chocolate is melted and marshmallows are golden brown (approx. 30 minutes)
  4. Dip Graham Crackers into the dip and enjoy!


Comments/Questions

We’d love to hear from you! Give us a comment on what you thought or if you have any questions. Check our grilling class calendar to join us at our next one! 

Grilling Classes


Chimichurri recipe for steak

Chimichurri Recipe for Grilled Meat

Chimichurri Recipe for Grilled Meat

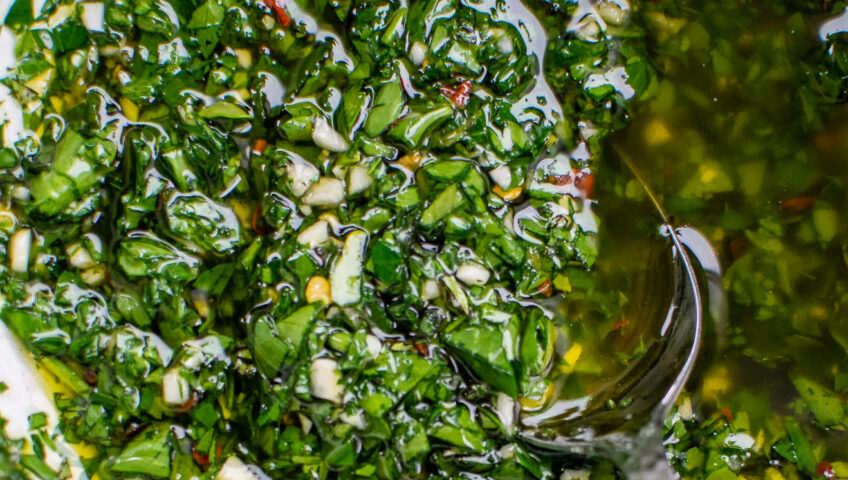
Chimichurri is a delicious, healthy & flavorful sauce that originated in Argentina and Uruguay, and is typically served as a condiment for grilled meats. Made with fresh herbs, garlic, vinegar, and olive oil, this sauce packs a punch of flavor that will elevate any dish. Whether you're looking to add a bit of zing to your steak, chicken, or vegetables, this chimichurri recipe is sure to impress. Plus, it's quick and easy to make, so you can enjoy it in no time.

Materials

  • 1/2 Cup Flat Leaf Parsley
  • 4 Cloves Garlic
  • 2 TBS Red Wine Vinegar
  • 1/2 Cup Extra Virgin Olive Oil
  • 1 TSP Dried Oregeno
  • 1-2 TSP Red Pepper Flakes
  • 1 TSP Salt
  • 1 TSP Black Pepper

Instructions

  • Finely chop the parsely and mince the garlic.
  • Combine all of the ingredients in a small bowl and mix together.
  • Let stand for 15 minutes. Taste and add more salt and pepper if needed. Use right away or store in the fridge in an airtight container.

Notes

Use this chimichurri recipe as the perfect topping for grilled meat like picanha steak, flank steak, chicken and grilled vegetables.
the best smoked buffalo chicken sliders recipe

Smoked Buffalo Chicken Sliders Recipe

the best smoked buffalo chicken sliders recipe

Smoked Buffalo Chicken Sliders

These delicious and flavorful smoked buffalo chicken sliders are the perfect recipe for your next party or tailgate. Featuring tender, juicy chicken that you can either smoke yourself or you can grab a rotisserie chicken for easy shredding. We then mix in tangy buffalo sauce and a whole lot of cheese, these sliders are sure to become a crowd favorite. Whether you're feeding a crowd or simply looking for a great lunch option, these sliders are easy to make and packed with flavor. So fire up your smoker, gather the ingredients, and let's get started on these buffalo chicken sliders!

Course Appetizer
Cuisine American

Ingredients


Buffalo Chicken Dip

  • 2 Cups Shredded Chicken We smoked a whole chicken for this recipe but feel free to use a rotisserie chicken or any chicken you have around.
  • 2 8oz Packages of Cream Cheese
  • 1/2 Cup Ranch Dressing
  • 3/4 Cup Buffalo Sauce You can substitute any pepper sauce like Frank's Red Hot. We used Lane's Buffalo Sauce.
  • 1/2 Cup Cheddar Cheese You can also use mozarella, monterey jack, colby jack or pepper jack.
  • 2 TBS Holy Voodoo Meat Church Seasoning Feel free to use your favorite BBQ seasoning.

Buffalo Chicken Sliders

  • 1 Package Kings Hawaiian Sweet or Butter Rolls
  • 1/2 Stick Butter
  • 1 tsp Garlic Powder You can also use 1 clove of fresh garlic minced.
  • 1 tsp Parsley

Optional:

  • Blue Cheese
  • Sliced Green Onions

Instructions


Buffalo Chicken Dip

  • Place the chicken, cream cheese, ranch, buffalo sauce, shredded cheese and seasoning in a 9x13" disposable pan or 12" cast iron pan and do a quick stir.
  • Set smoker to 250 degrees. Add wood chips, chunks or pellets of your choice to smoker. We cooked this on the Green Mountain Pellet Grill and went with pecan pellets.
  • Place pan mixture onto smoker uncovered for around 1 hour. Stir the dip about every 20 minutes.
  • Before taking off the smoker taste the dip. If you would like it to be spicier, add some more buffalo sauce.
  • After an hour or when it looks melted and well combined, remove it from the smoker and stir. Right now this dip is finished and would be great with tortilla chips or vegetables. But let's continue and make sliders!

Buffalo Chicken Sliders

  • Melt butter in the microwave and add garlic powder and parsley and then mix.
  • Cut your Hawaiian Rolls in half. Keep them whole for easy assembly.
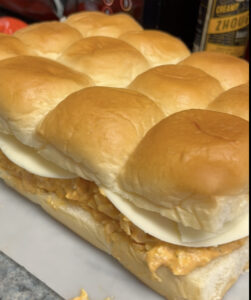
  • Spread the buffalo chicken dip on the bottom layer of the rolls. Spread as thin or thick as you'd like.
  • Top with cheese and then the top layer of the rolls.
    buffalo chicken sliders recipes
  • Spread the melted butter mixture on top of the sliders.
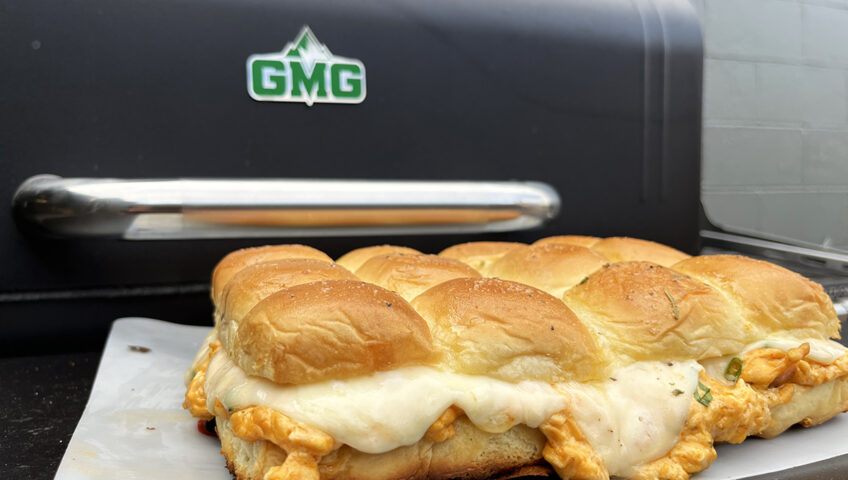
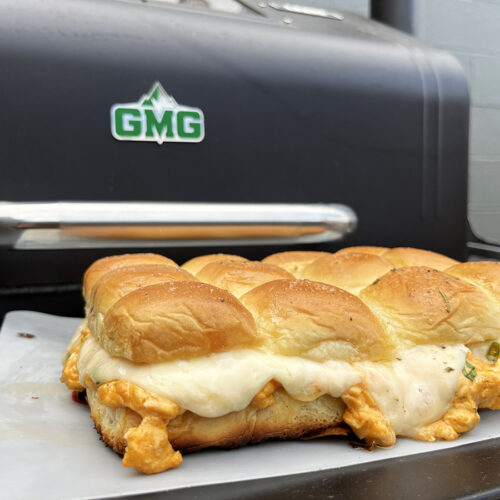
  • Set your smoker to 250-300. Place the sliders onto the grates. You can also put aluminum foil underneath them or put them in a pan.
    smoked buffalo chicken sliders on smoker grill
  • The sliders will be done after about 10 minutes or when the cheese is melted and the rolls look golden brown. Slice up and then enjoy!

Notes

Recipe Notes:

  • Feel free to use whatever cheese you like. Other cheeses that would be great in the mix or on top of the sliders are mozzarella, pepper jack, monterey jack, colby jack and queso. 
  • If you like blue cheese add it to the mix or on top when you make the sliders. 
  • Use whatever pepper buffalo sauce you have or like the best.
  • Feel free to use rotisserie chicken if you don't feel like cooking chicken. You can even use canned chicken. 
  • You can cook this in your crockpot, oven or even on the stove, you don't have to have a smoker to enjoy this recipe. 


Let me know what you thought of the recipe below or how you switched it up!

Keyword buffalo chicken